1
Create Your Thanks.io Account
Use the Homeboss link so your account auto-connects to ours.
⭐ Sign Up Through This Link
Signing up through this link automatically links your Thanks.io account to ours and loads our custom Homeboss seller postcard templates into your account.
Create My Thanks.io Account →
- Click the gold button above (or visit: https://dashboard.thanks.io/register/homeboss?afmc=homeboss)
- You'll see the co-branded Thanks.io + Homeboss welcome page shown below.
- Enter your Name and Email Address using the same email you used to sign up for Attract More Listings.
- Click Next to continue and complete the signup.
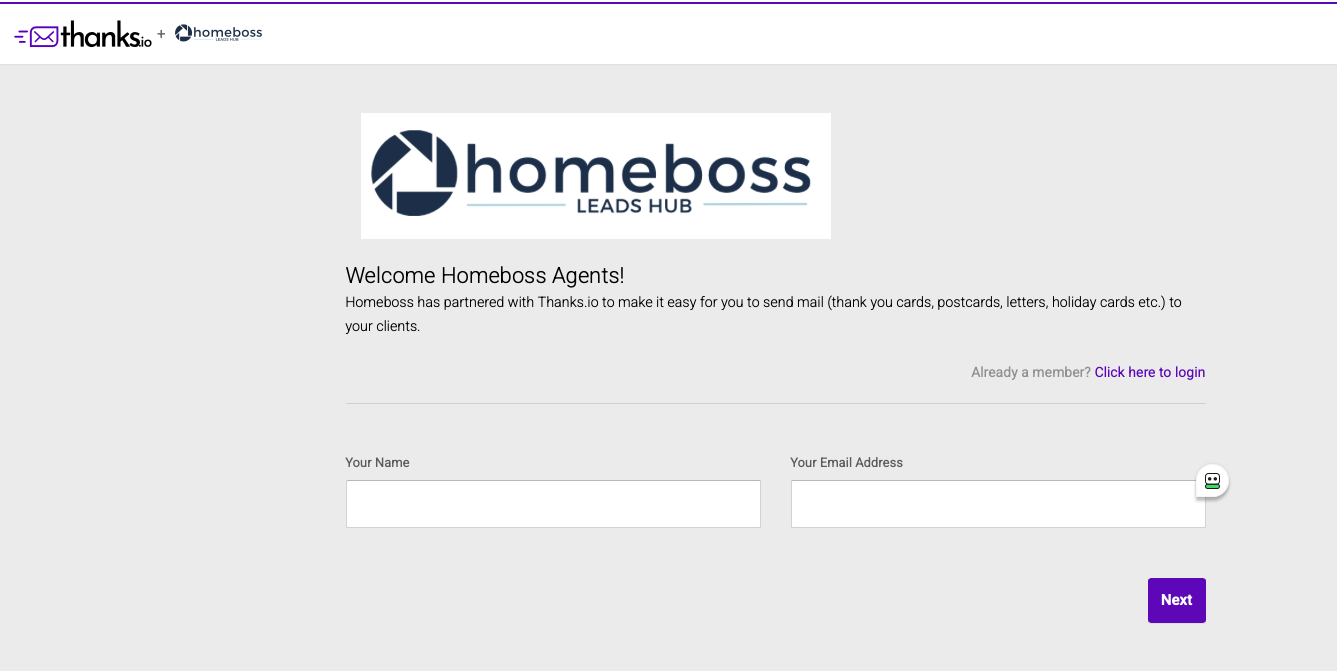
The co-branded Homeboss + Thanks.io welcome page. If you don't see "Welcome Homeboss Agents!" you used the wrong link — go back and use the gold button above.
💡 Why the special link matters: If you sign up at thanks.io directly (without the Homeboss link), your account won't be connected to ours and you won't get the custom postcard templates. Always use the link above.
2
Set Up Your Billing
Add a card on file before mail can go out.
- In Thanks.io, click the gear icon in the top right corner.
- From the dropdown menu, click Billing & Credits.
- Add a credit or debit card. You won't be charged until mail is actually sent.
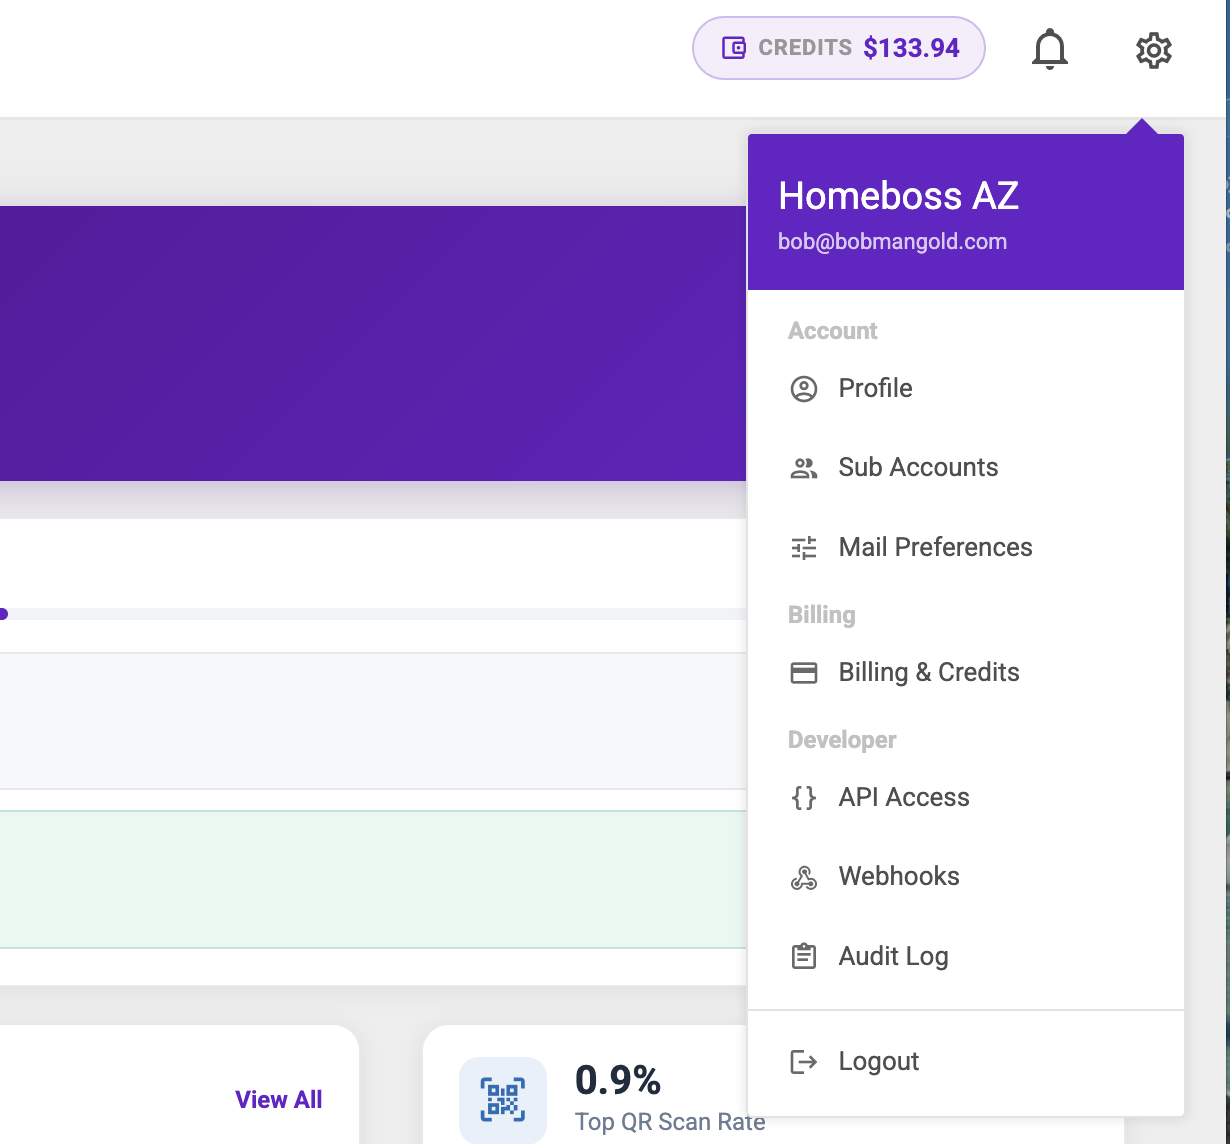
Click the gear icon in the top right to open this menu, then click Billing & Credits to add your payment method.
💰 How billing works: Thanks.io charges approximately $0.89–$1.16 per postcard. Monthly plans are available to substantially lower your cost per postcard. You're only charged when mail is actually sent — never automatically. You always review and approve leads in your Attract More Listings dashboard before postcards go out.
3
Create Your API Key
This is the secure link between your dashboard and Thanks.io.
- Click the gear icon in the top right corner of Thanks.io (same as in Step 2).
- From the dropdown menu, click API Access.
- You'll see the API Access page with a section called API Keys.
- Click the purple + Create API Key button in the top right of the API Keys section.
- Name your key "Attract More Listings" so you remember what it's for.
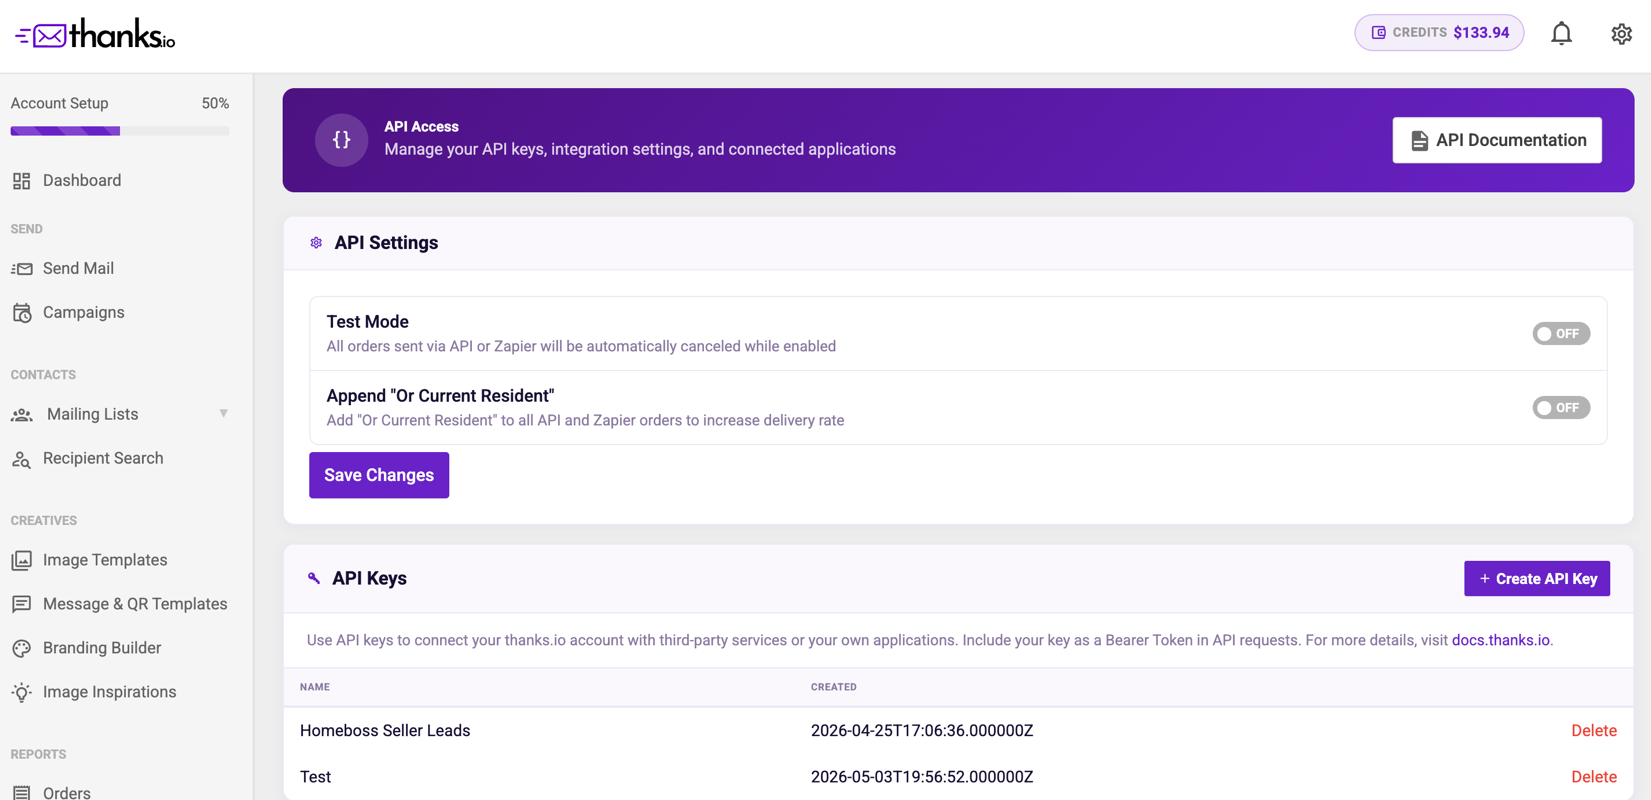
Click the purple + Create API Key button in the top right of the API Keys section.
📋 Copy this: When Thanks.io shows you the API key, copy the entire string immediately. You'll paste it into Step 6 of your Attract More Listings checklist.
🔐 Security note: Treat your API key like a password. Don't share it. If you think it's been compromised, you can come back to this page and create a new one — the old one can be deleted.
4
Add Your New Mailing List
Name it "Seller Leads" or similar.
- In Thanks.io, click Mailing Lists in the left sidebar.
- Click the + Add List button in the top right of the page.
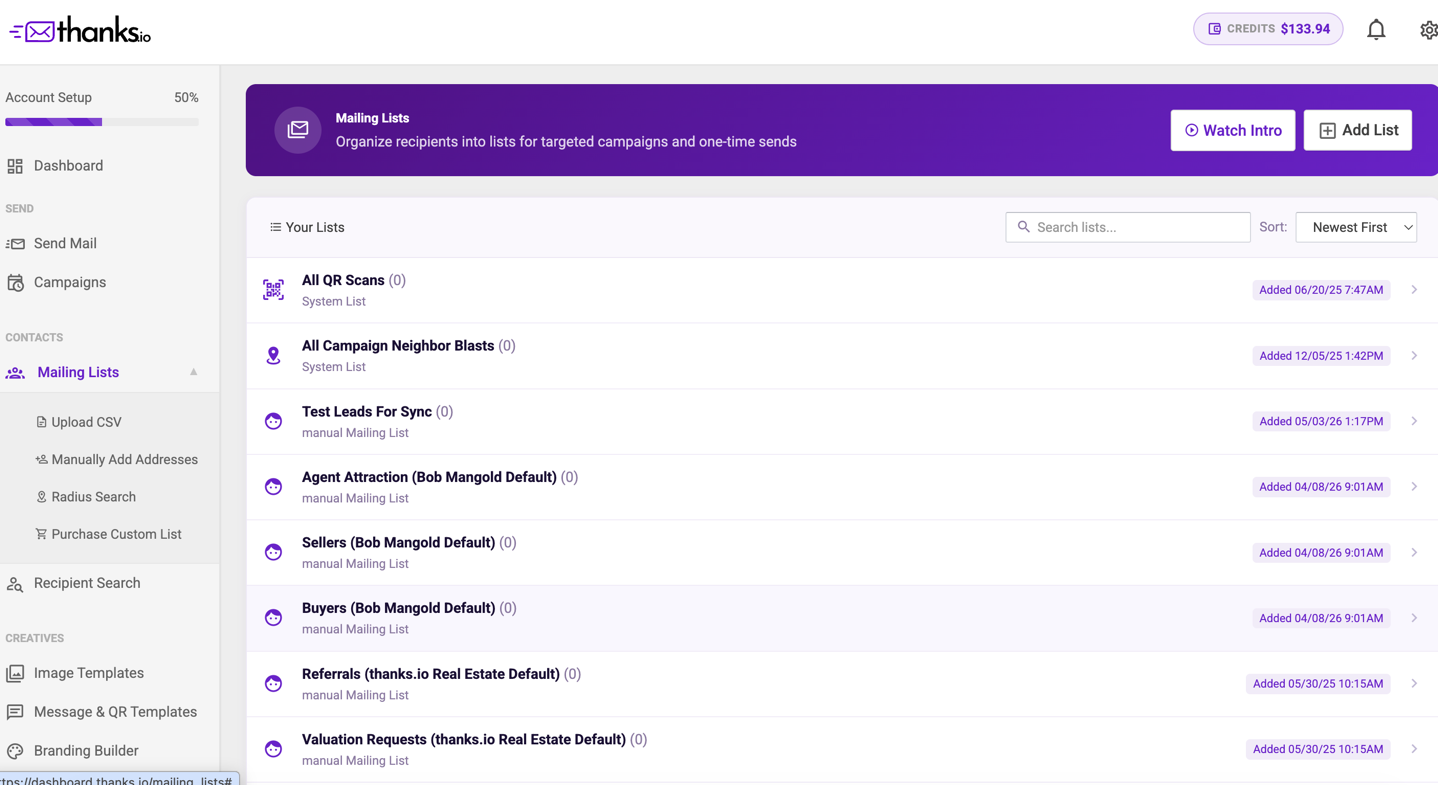
Click Mailing Lists in the left sidebar, then click the + Add List button at the top right.
📛 Naming tip: Name your list something memorable like "Seller Leads — [Your Market]". For example, "Seller Leads — Phoenix" or "Seller Leads — North Atlanta". This keeps things organized if you ever expand to multiple markets later.
5
Choose "Manually Enter Addresses"
This is the right list type for your dashboard.
- A popup will appear asking how you want to build your list.
- Click Manually Enter Addresses.
- Save the list — it will start empty. Leads only get added when you click Send in your Attract More Listings dashboard.
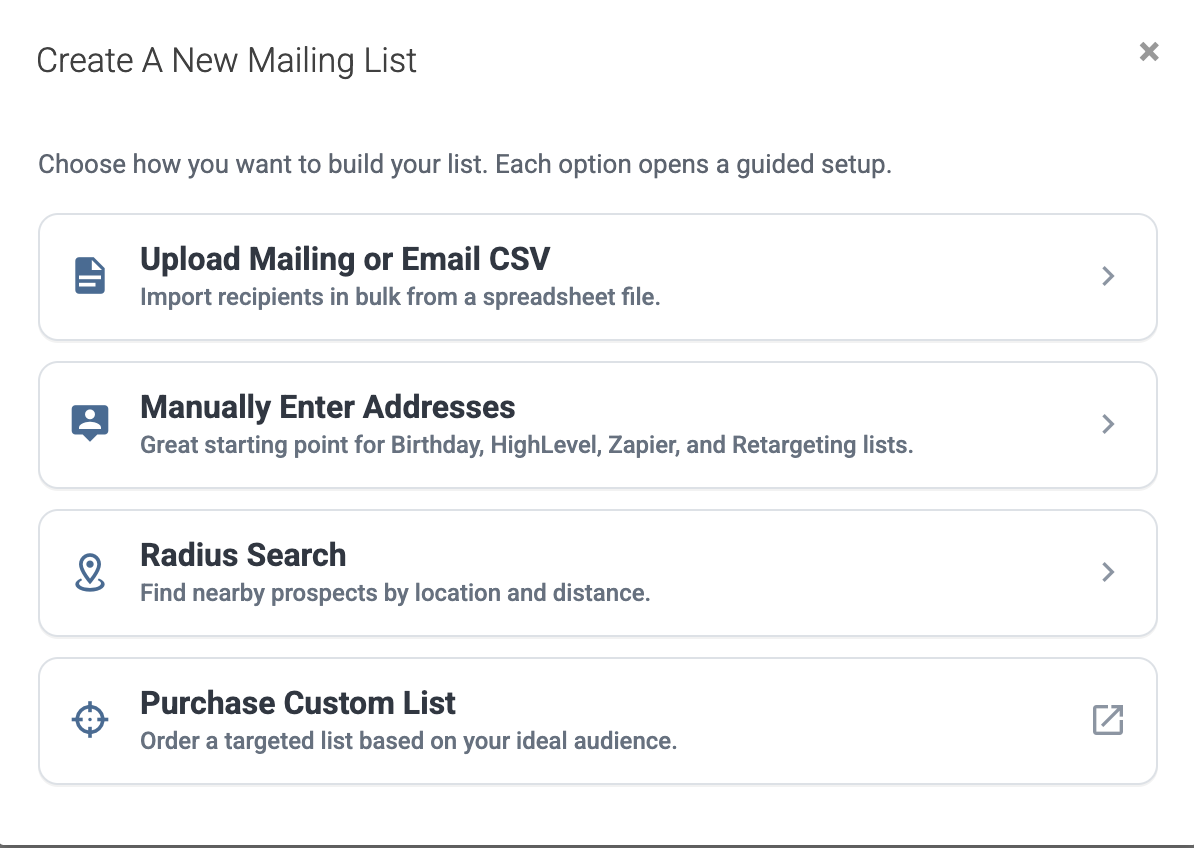
Choose Manually Enter Addresses. Your dashboard will push leads to this list automatically — you don't need to upload a CSV.
💡 Why this option? Your Attract More Listings dashboard pushes addresses to the list automatically when you click Send. Choosing "Upload CSV" or "Radius Search" would lock the list to a different workflow.
6
Find & Copy Your Mailing List ID
It's the number at the end of the browser URL.
- After saving your new mailing list, click into it to open the list detail page.
- Look at the browser URL bar — it will look like:
dashboard.thanks.io/mailing_lists/118671
- The number at the end (e.g. 118671) is your Mailing List ID.
- You can also find the same ID directly on the page — look under Information → ID.
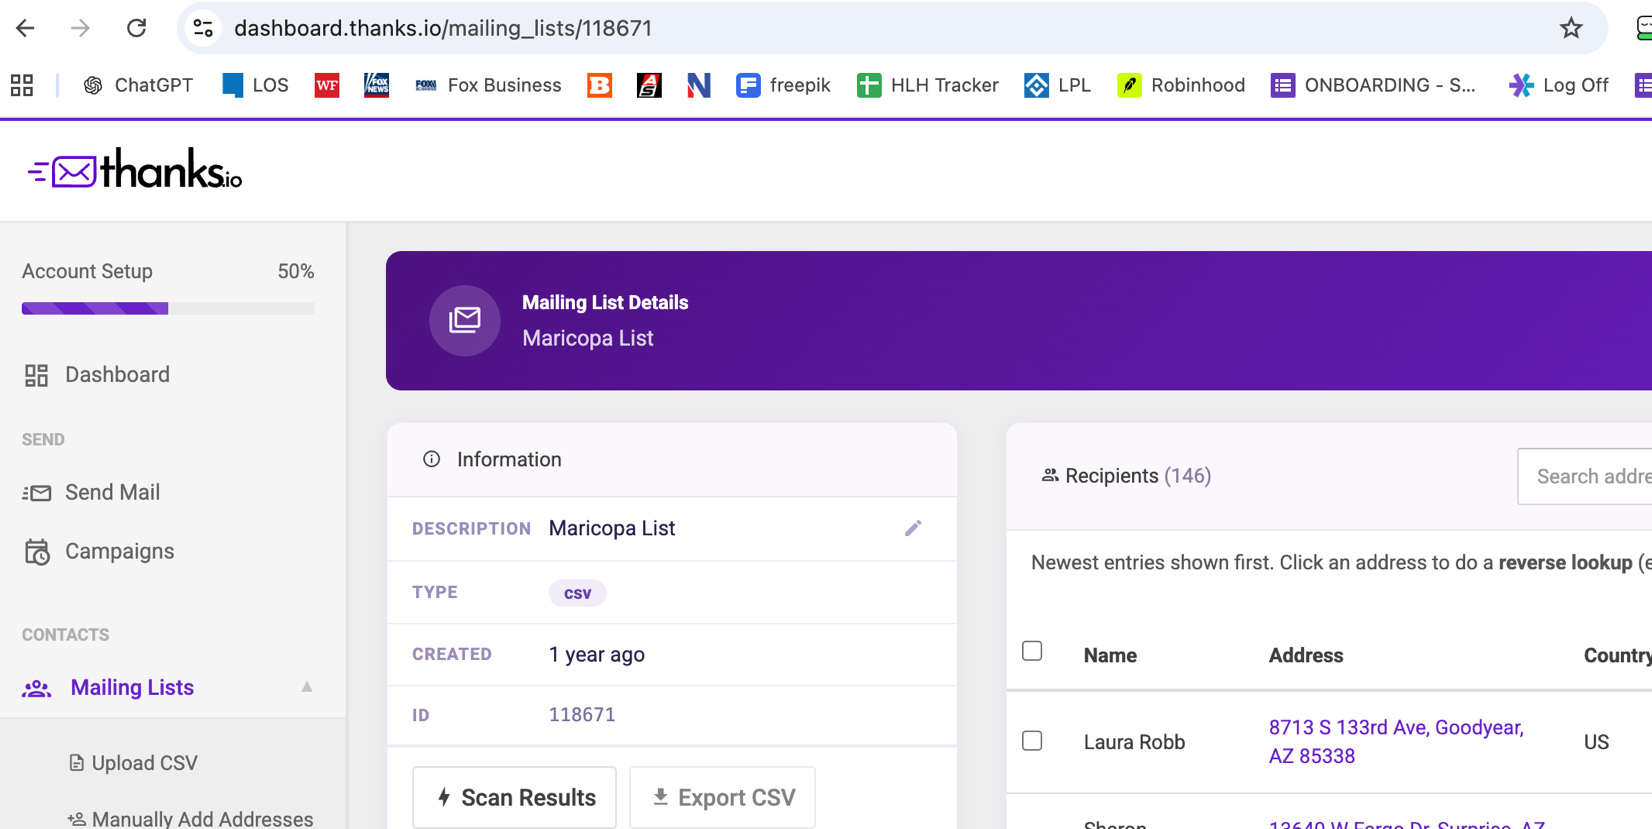
The number after
/mailing_lists/ in the URL is your Mailing List ID. In this example, it's 118671. The same ID is also shown directly on the page under Information.
📋 Copy this: Copy just the number (e.g. 118671) — don't include the slashes or text around it. You'll paste it into Step 6 of your Attract More Listings checklist.
✅ Almost done! Once you have both your API Key (from Step 3) and your Mailing List ID (from this step), head back to your Attract More Listings checklist page and paste them into Step 6 to complete setup.